Host application - Capita
Instructions for the Installation and Integration of Keyfax with Academy Housing (v3-7).
Note: This document was created with screen shots and certain information supplied by Capita Software Services, not only are the contents subject to change without notification but some of the processes or steps explained in the testing of the integration may require additional support from Capita SS.
Also note that references to JOBFAX have been superceded by 'Keyfax Repair Diagnostics' although where configuration parameters are involved, these settings continue to use the JOBFAX nomenclature.
Integration of Keyfax into Academy's Repair Diagnostics
Once Keyfax has been installed on the Client PCs or Terminal Services server the Academy system needs to be configured to allow the exchange of data with Keyfax.
Academy Environment Variables
The following environment variables need to be set in the Academy Launcher:
|
ACADEMY_EXTREPAPP |
Versions 3 6: Set to JOBFAX Version 7: Set to JOBFAXXML This MUST be in capital letters. |
|
ACADEMY_EXTREPPATH |
The complete path for the external repairs executable. E.g. C:\Program Files\Keyfax\Keyfax.exe'
|
|
ACADEMY_EXTREPOUT |
The complete absolute path of the output file produced by Keyfax. Version 3 6: C:\Program Files\Keyfax\export.ini' Version 7: C:\Program Files\Keyfax\export.xml' |
|
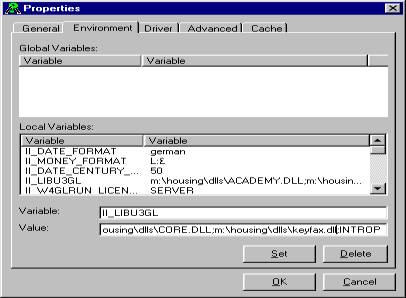
II_LIBU3GL |
This Ingres variable has to be modified to include a new dll called keyfax.dll, which is supplied by Academy and should be included in the PCIMAGES area. (Note that this DLL may be corrupted and if problems are encountered, should be replaced as explained here)
|
|
ACADEMY_JOBPASS |
Set to the global password defined on Keyfax Repair Diagnostics Global'
|
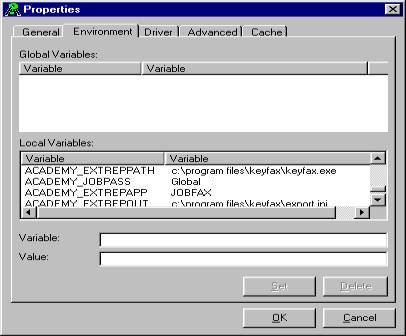
These are set in the Properties screen under the Environment tab. This dialog is displayed when right-clicking the connection icon required in he Academy Launcher and selecting the Properties' menu item from the context sensitive menu; see the screen capture below:
Executable
The Academy PC Images folder should contain an executable file (EXTEVENT.EXE), which Keyfax will call once a repair script is completed. The location of this program must be known before any Keyfax Client installations are run. The path must be specified in the installation configuration file KF32INSTALL.INI, e.g.
[Install]
...
InformHostApp=C:\pcimages\extevent.exe
InformHostAppCodes=1
...
Keyfax Repair Diagnostics will call the EXTEVENT.EXE' application for various status codes as specified; this is usually set to '1'
Keyfax DLL
However, this file has been deployed by a previous Academy installation and may be corrupt (we have found this to be the case at some Academy customer sites) and should be replaced by that installed by the Keyfax installation in the Windows\system folder under Win9x or WinNT\System32 under NT\Win2k.
The symptoms experienced with the corrupted copy, are recognisable when a repair script is completed in Keyfax, the submit button is clicked and the Academy Housing does not read the exchange XML file.
Date Format (Keyfax 3.1 or earlier)
[Exchange]
;Academy users need German date format! dd.mm.yyyy
LogDateFormat=dd/mm/yyyy hh:nn:ss
CBDateFormat=dd/mm/yyyy
Date Format (Keyfax 3.2 or greater)
If required, date date formatting requirements can be implemented by the use of Rules. However, current Academy versions do not process any returned dates so this is no longer an issue.
Add Keyfax Users
It will be necessary for users to be set up within Keyfax to allow the Academy Repair Diagnostics application to launch Keyfax without a Keyfax login dialog being displayed. For each Academy user requiring access to Keyfax, add their user details in the Keyfax Administration Console or Admin functions within Task Manager, e.g.
Testing the Integration between Academy and Keyfax Repair Diagnostics
Note: If the globe does not appear for a specific user, disabling and enabling the account in Academy has been known to resolve this.
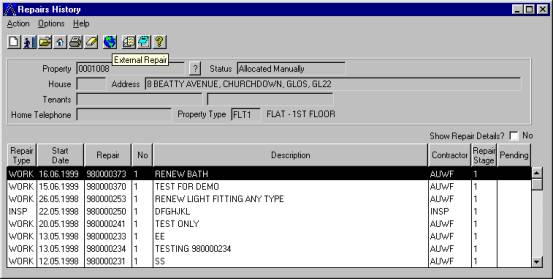
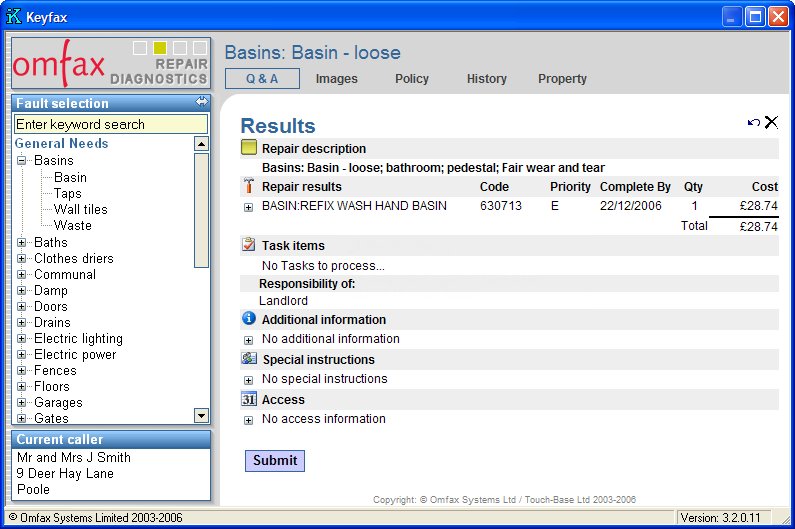
Upon clicking the button on the Repairs History screen, Keyfax will be invoked and the tenant's name would be passed across to the Repair Diagnostics application and appear in the bottom left corner:
The Academy system will first check if the passed jobcode/schedule code is a PDRR. If a PDRR has been found, the system will take the user to the Fast Create screen.
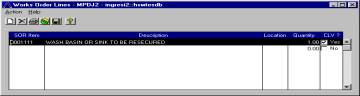
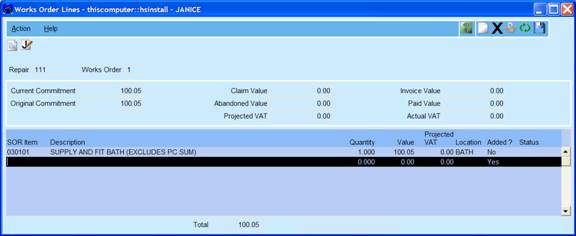
However if a PDRR has not been found, the system will try to locate a normal jobcode/schedule of rate code in Academy Housing. In case it is found, the system will take the user to the Create Works Order screen. The user will be required to enter the necessary details to enable the repair to be logged, and the Work Order Lines screen will be populated with the schedule of rate code.
Fast Create
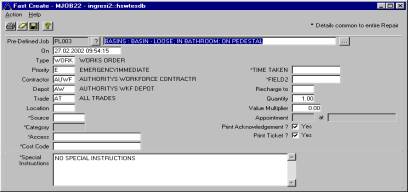
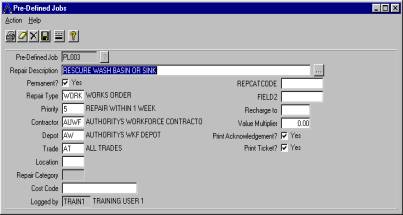
PDRR for PL003
Long Create
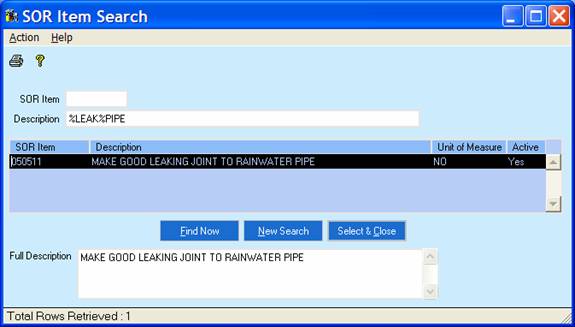
In this example 630713 has been set up on the Housing system as a SOR item. It has not been set up as a Pre-Defined Repair.
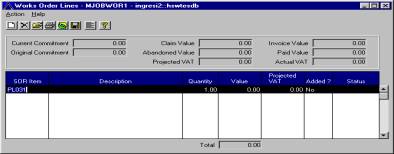
The user will be presented with the Create Work Order screen, and can make amendments if required prior to saving the repair. The Work Order Lines will automatically be populated with the SOR item number.
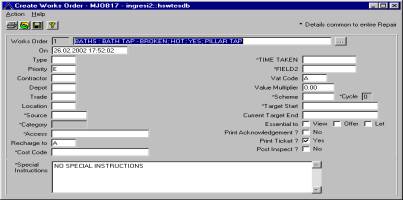
Create Works Order
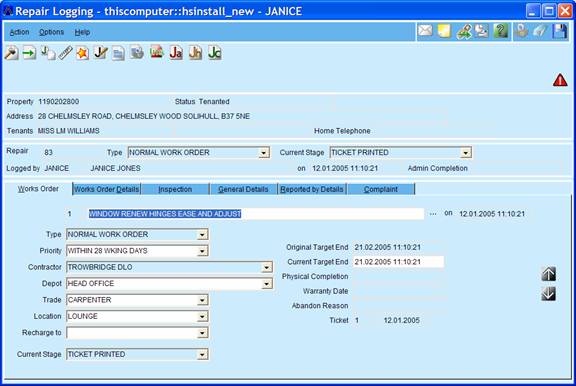
Academy Repairs Logging Process (Version 11 and greater)
Fig 1. Repairs History Screen. Showing history of all repairs on the property. At this stage you would select Keyfax by selecting the World icon at the top left.
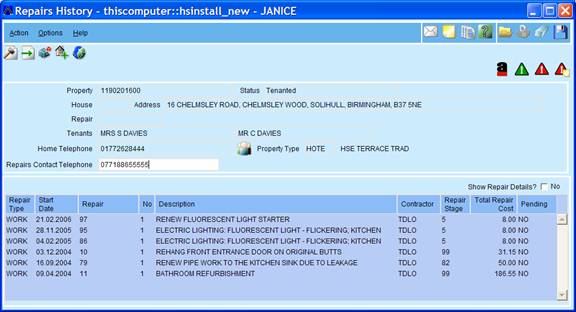
Fig 2. Create Works Order. On completion of the Keyfax screens this screen appears, populated with the information generated by Keyfax. Any extra info, such as the source of the call, may be added at this stage.
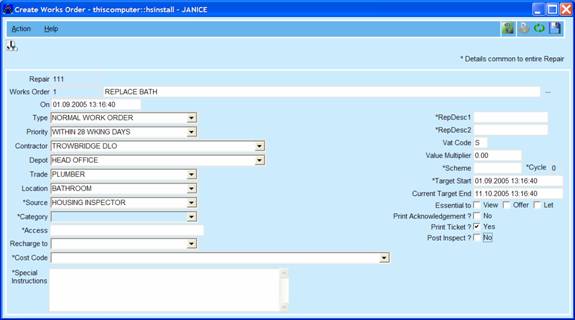
Fig 3. Works Order. On saving the Create Works Order screen above a Works Order is created.

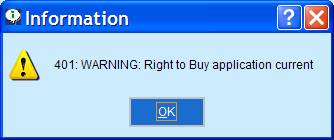
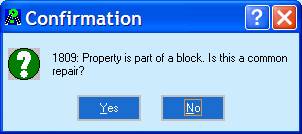
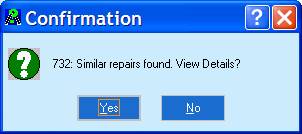
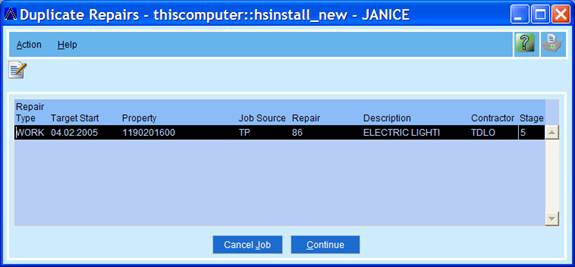
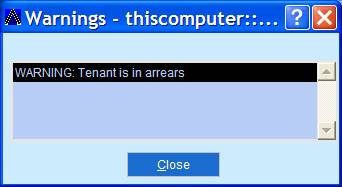
Possible system-generated warnings invoked during repair logging (V11)
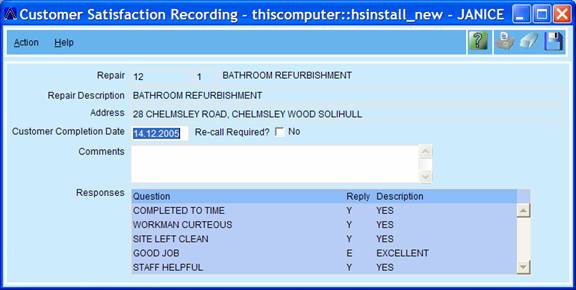
Customer Satisfaction Reporting (V11)