Installation - Administration Console
Uninstall previous versions if they exist
It is important to uninstall any previous versions of Keyfax, which may already be installed on each PC before installing a later version.
To check the current version of Keyfax, the Keyfax status bar contains the version number. This is in the bottom right hand of the client application. The CD will be labelled with the version number. If Keyfax is not running, Right-clicking the Keyfax.exe in C:\Program Files\Keyfax folder and selecting properties, then version, the current version will be displayed.
To uninstall any previous version, from the start menu, select 'Settings - Control Panel - Add/Remove Programs' and select 'Keyfax', then click 'Change/Remove'. When the uninstall dialog displays, choose 'Automatic' for the first screen, 'No' for the second, then while the files are being removed you may be asked if you want to remove a shared component; answer 'Yes to All' to continue.
Where large numbers of client machines are involved, it may be more practical to script the uninstall process. The following command will perform a silent uninstall of Keyfax software (including Admin Tools if present):
C:\Progra~1\Keyfax\UnWise.exe /S C:\Progra~1\Keyfax\INSTALL.LOGInstalling the Keyfax Server files for version 3.2.x.x
The Keyfax 3.2 web-service must be installed on a Microsoft Windows 2000 or 2003 Server, running Internet Information Server (IIS) version 5 or greater. In addition it is recommended that the SQL Server database used for the scripts is installed on a separate Microsoft Windows 2000 or 2003 Server, running Microsoft SQL Server 2000, in 'mixed' mode (allows SQL user authentication as well as NT authentication)
The Installation of the Keyfax IIS files (together with their business logic DLLs) and SQL Server database must be installed and configured by Omfax technicians before any Administrator or client installations can take place. Please contact Omfax Systems Ltd for additional information.
see Installation - SQL Server
see Installation - Web Server (IIS)
Installing the Keyfax Administration Console
To use the Keyfax Administration Console, the application must be installed on the administrators PC. This is supplied as a setup file on the CD root, named KF32admin.exe.
Administrators PC minimum specification:
- Windows 2000, Windows XP or Windows 2000/2003 Server
- Internet Explorer 6.0
- Hardware to minimum Microsoft OS requirement
Please note: The Keyfax Administration Console WILL NOT work correctly if installed on a Citrix or Terminal Services Server. It must ALWAYS be installed on a workstation, where the user has local administrative rights.
Note: Installation should only be carried out by an operator with local administrator rights. This is as a result of the Keyfax configuration settings being required to be written to an area of the system registry accessible only to users with administrator security rights.
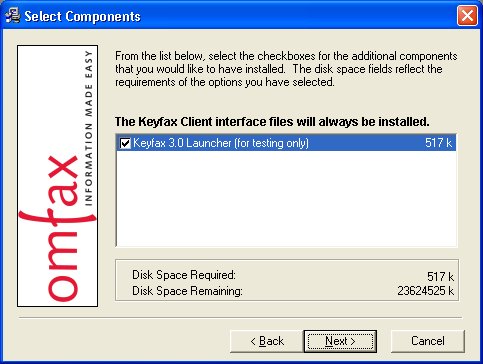
When this application is installed, it will optionally allow the deployment of a test Keyfax launcher (TestOCX.exe) to allow for basic testing of Keyfax 3.2. This is not designed a multi-user utility, so must be used ONLY for simple test purposes.
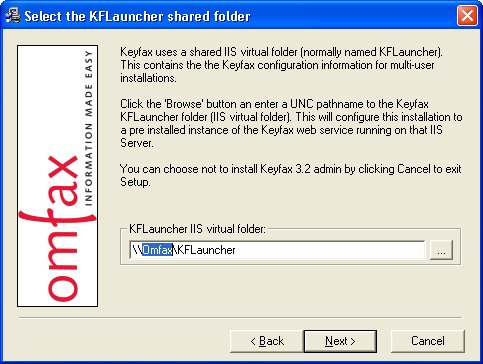
During installation the user will be requested to enter the path to the IIS servers KFlauncher shared folder, so the setup can configure the client PC to run the Keyfax 3.2 web-service from the configured Web server. As a shared folder should have been configured during the IIS configuration, it is a simple case of changing the word 'Omfax' in the default path provided to that of the IIS_SERVER_NAME (see screen capture below:):
Upon completion of the KF32admin Installation (and the optional deployment of the test Keyfax launcher was selected), the start menu will contain a link to the TestOCX.exe 'Keyfax Launcher (testing only)'. This contains information to send Keyfax 3.2 similar to the browser Keyfax test page described in the previous section (see screen capture below:).
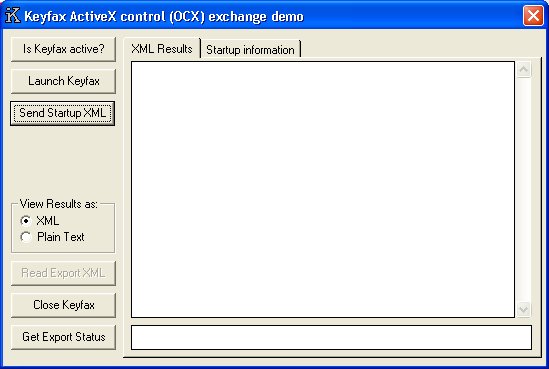
- This shows The TestOCX.exe application after the 'Launch Keyfax' button has been clicked. The status displayed (-2) indicates that 'Keyfax Launched OK'.
- Information to be sent to Keyfax 3.2 can be changed by editing the inputs on the 'Startup information' tab. This has default values populated from an initialisation file (TestOCX.ini) in the 'C:\Program Files\Keyfax' folder on the client PC.
- Once the information required to be sent is entered, the 'Send Startup XML' button should be clicked, This will then launch Keyfax 3.2 in a Internet Explorer browser control, within a custom popup window.
- After a Keyfax Repair Diagnostic is completed, the resulting XML data is formatted and output to the main 'XML Results' display within the TestOCX application.
Note: For full information on Keyfax 3.2 on testing Keyfax scripts and user training, please contact Omfax Systems ltd.